HOW TO ENSURE YOUR DESIGN PROJECT FEELS EXPENSIVE
I see it all the time, you invest so much into your home renovation yet there little things that just don’t upgrade the space. We can have this design vision but if not implemented correctly it can go downhill so fast you won’t know what to do with yourself! If you are committing to making your home special, which I hope you do, I want you to not have regrets. One of the biggest take aways from this is, if you do not specify every little detail, the installer can interpret their own solution. Which leads to your vision being crushed, not to be dramatic.
The hopes of this post is to steer you clear of making these home design mistakes that give us the …ick and what to do instead. You will find clear examples of exactly what to ask for on your home design project.
I am confident that these tips are going to help add so much value to your project. It is crucial that you are aware of small details that will need to be expressed to everyone on the job site.
NUMBER 1 - trim installation
Choose your trim and installer wisely.
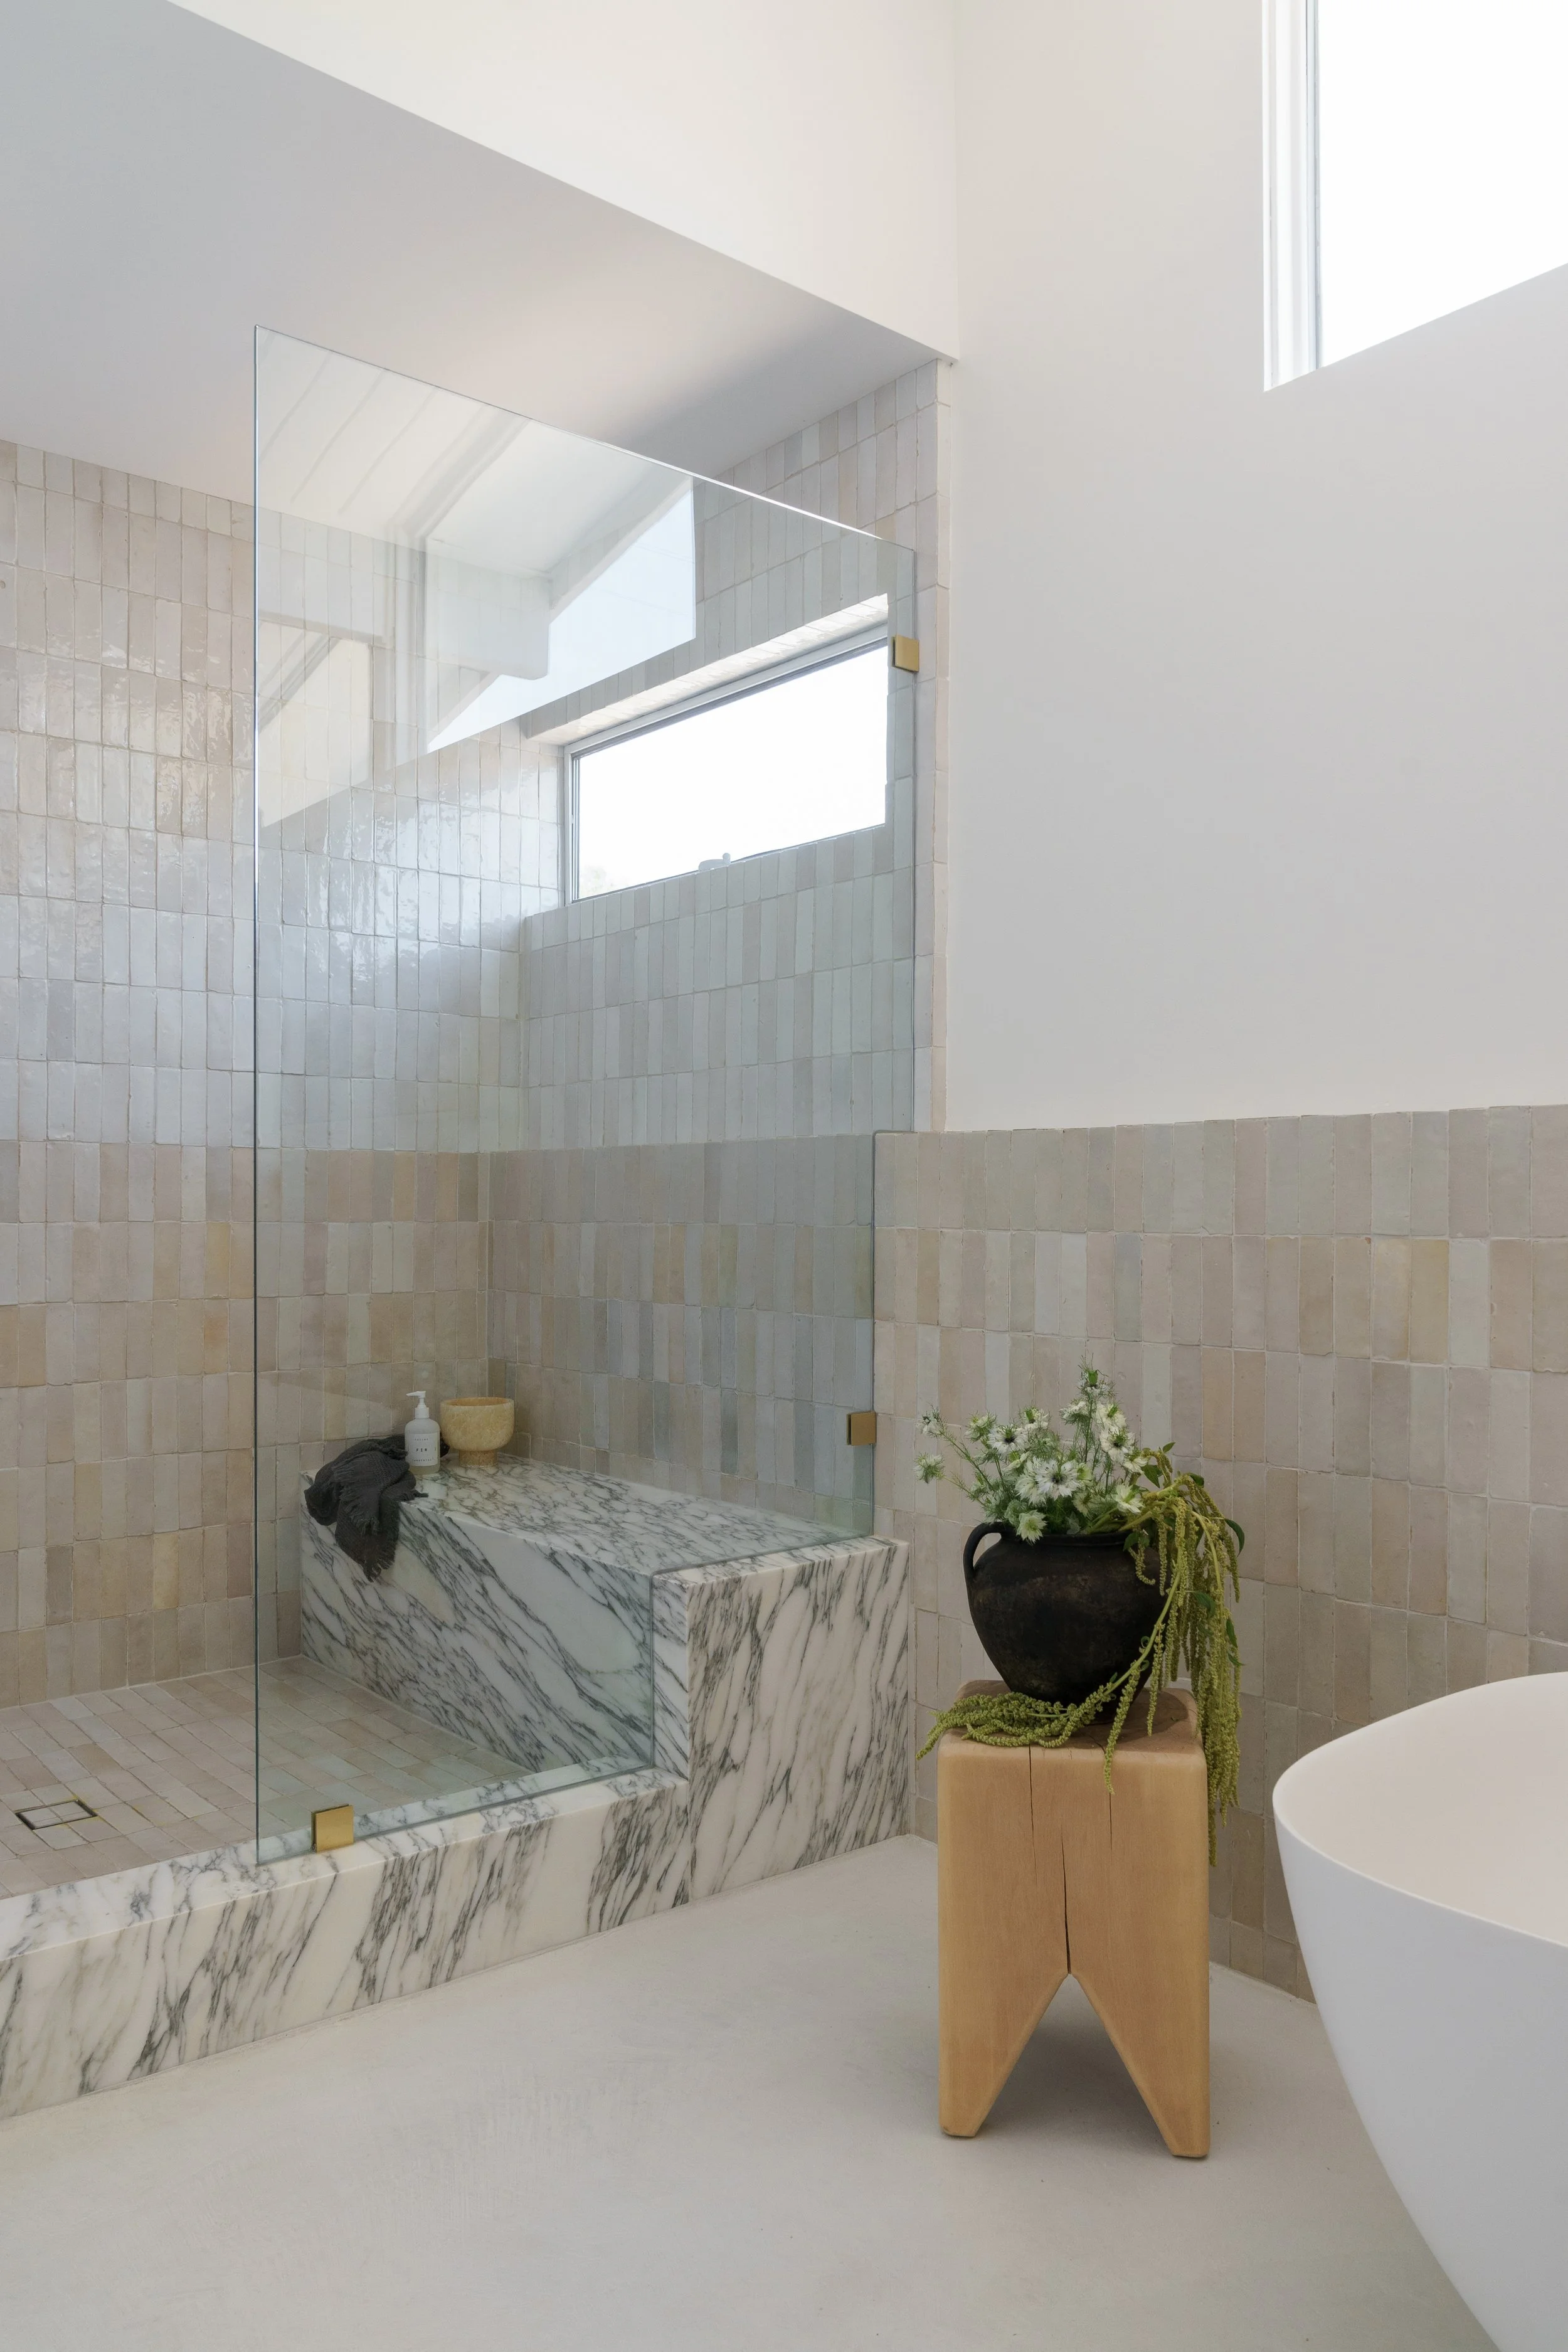
A quick explanation of what to avoid. “What is Schluter?”, everyone asks as I am being so adamant for design installs. Schluter tile trim consists of a metal finishing edge in a variety of sizes and colors. Most common use is trimming your shower tile edge, shower niches and backsplash edges. It’s purpose is to finish the edge of any tile job yet all it does is cheapen your design right off the bat.
Skip the metal edging that haunts my soul. Opt for asking your installer to miter the edges or use a caulk finish that will effortlessly transition to your wall. One more installation method that I adore is a natural material finish such as a Marble molding.
I will show you an example of what to ask for when installing a mitered niche.
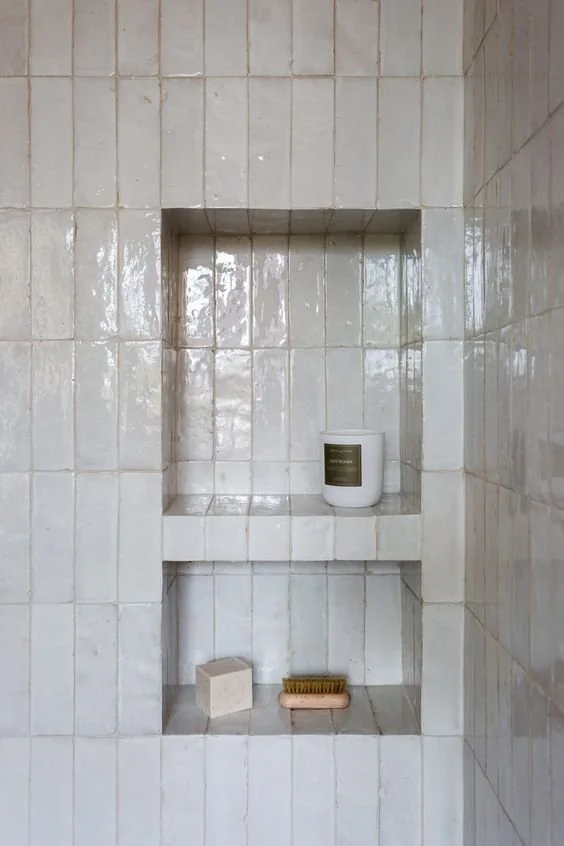
The Identity Collective.
So, What is a Mitered Edge?
A mitered edge is created when two edges are cut at 45-degree angles, then set together to create a 90-degree edge. This means that the seam is at the corner, resulting in a seamless illusion of a horizontal tile appearing to spill over onto the vertical edging surface.
Last thing to keep in mind is the thickness of the final tile. For Zelige tile (a very thick handmade product) I recommend the a mitered install as seen in the photo below. For thinner tiles, you can get away with the caulked edges and stone trim pieces.
NUMBER 2 - the wrong appliances
If there is one thing that hurts my soul more than an appliance that sticks out like a sore thumb I don’t know what it is. Picture this, you have curated the most beautiful kitchen design, custom cabinetry, stone countertops, and the backsplash of your dreams. Then there is the side of the fridge that was not wrapped in your cabinetry but instead sticks out about 4” and had gaping holes that will wreck your vision instantly.
Please no. If you can swing it, and I suggest that you make a way to buy PANEL READY APPLIANCES that are COUNTER DEPTH. Another term for this install method is integrated appliances.
If you choose to not have panel ready, make sure your cabinet installer will frame out the refrigerator so there are no open spaces surrounding no matter what angle you are looking at it.
Gaps = Incomplete design.
There won’t be a moment that you would regret it and immediately make your kitchen look intentionally designed.

NUMBER 3 - textured walls
If you want your home to instantaniously look richer, it is time to smooth your walls. This application is the best way to update home, I can’t even begin to tell you the difference it makes.
What to ask for? Level 5 texture, this is the smoothest look you will be able to get. You will thank me. This method also up’s the home value.
NUMBER 4 - when you get the idea to have an accent floor, pause
Another one I see quite often is accent floors. This can go South so fast it’s not funny. When you are installing your floors, you are spending a lot of money, so you want to ensure that there is longevity with design. Trends are tricky and it can really damage longevity when affixed materials are installed that you may want to rip out 2 years down the line. Opting for seamless floors that sway neutral is a surefire way to create a rich and seamless look that you can enjoy for years.
Let’s not forget, when you start to add more floors in one large space, it can appear as patchwork which can come across inexpensive. If you are going to go wild, choose to do so in one secluded space such as a bathroom.
NUMBER 5 - to backsplash or not to backsplash
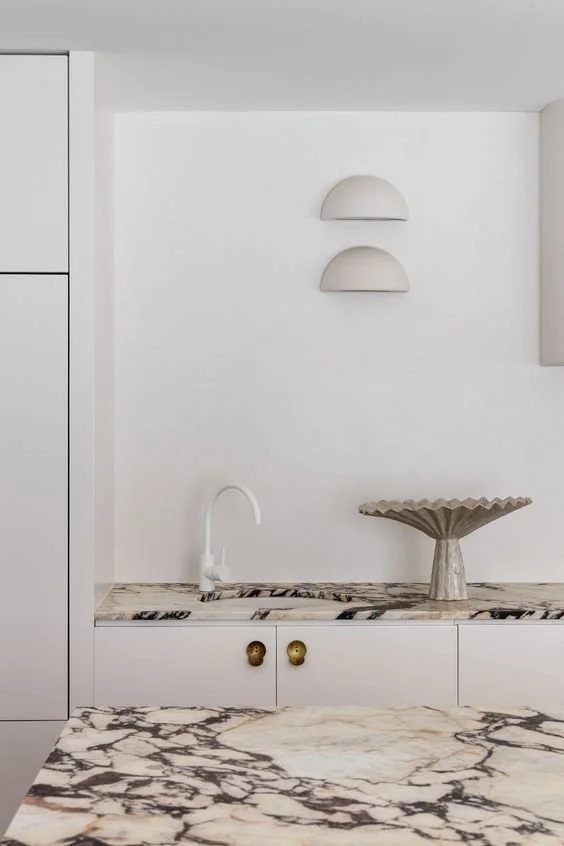
Let’s avoid the 4'“ countertop splash that installers tend to automatically make when fabricating your stone. Sometimes it works if properly incorporated by thoughtful design, but very seldom it does.
For example, if you plan to install a tile backsplash I will always specify to not install the 4” countertop backsplash. Now, if you plan to not have tiled backsplash, the 4” can appear quite elegant. BUT I would take it a few steps further and make it 8” because at the end of the day we want custom. This is a good option if you want the slabsplash but maybe don’t have enough material or budget.
Big key take away for this is it all depends on the surrounding design which is why it is so important to have a design plan. Countertops are expensive so let’s install them correctly. It must be thoughtfully designed to flow with the rest of the space. Your kitchen and bathrooms are very important rooms that I think we can all agree want done the right way.